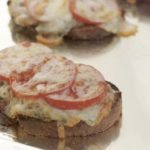
Indulge in the comforting embrace of a Tuna Melt, a culinary classic that effortlessly blends simplicity with irresistible flavors. Whether you’re a seasoned chef or a novice in the kitchen, this guide is tailored to equip you with everything you need to know about the art of crafting the perfect Tuna Melt. From its nutritional value to a step-by-step recipe and smart preservation tips, let’s embark on a journey of culinary satisfaction.
Nutritional Value of Tuna Melt:
Before we dive into the kitchen, let’s explore the nutritional treasures packed within a Tuna Melt.
Protein Powerhouse:
Each bite delivers a protein punch courtesy of chunk light tuna, promoting muscle health and overall well-being.
Balanced Fats:
The harmony of tuna and low-fat mayonnaise provides a balance of healthy fats, supporting bodily functions and keeping you satisfied.
Vitamins and Minerals Infusion:
Shallots and parsley contribute essential vitamins and minerals, enhancing the nutritional profile of your meal.
Low on Sodium:
A dash of hot sauce and minimal salt keep sodium in check, making Tuna Melt a heart-healthy option.
Tuna Melt Recipe
Ingredients
- 2 cans 5 ounces each chunk light tuna, drained
- 1 medium shallot minced (2 tablespoons)
- 2 tablespoons low-fat mayonnaise
- 1 tablespoon lemon juice
- 1 tablespoon minced flat-leaf parsley
- ⅛ teaspoon salt
- Dash of hot sauce
- Freshly ground pepper to taste
- 2 tomatoes sliced
- ½ cup shredded sharp Cheddar cheese
- 4 slices whole-wheat bread toasted
Instructions
- Begin by preheating your broiler, ensuring it's ready to give your Tuna Melts the perfect golden finish.
- In a medium bowl, combine the drained tuna, minced shallot, mayonnaise, lemon juice, parsley, salt, hot sauce, and freshly ground pepper. Mix well to create a flavorful tuna salad.
- Take each slice of toasted whole-wheat bread and spread 1/4 cup of the tuna mixture evenly. Top it with slices of fresh tomatoes, adding a burst of freshness and juiciness.
- Sprinkle 2 tablespoons of shredded sharp Cheddar cheese on top of each tuna-covered slice. The cheese will melt beautifully during the broiling process.
- Place the assembled Tuna Melts on a baking sheet and put them under the broiler. Keep a close eye as the cheese melts and turns golden brown, usually taking 3 to 5 minutes.
- Once the cheese is bubbling and the edges are golden, remove the Tuna Melts from the broiler. Allow them to cool for a minute before slicing and serving.
Great Tips for Preserving Tuna Melt:
Preserving the delightful essence of your Tuna Melt ensures a satisfying experience every time. Here are some expert tips:
Refrigerate with Care:
Store leftover Tuna Melt in an airtight container in the refrigerator for up to 2 days. Note that the bread may lose some crispiness upon refrigeration.
Freeze for Later:
While best enjoyed fresh, you can freeze Tuna Melts by wrapping them tightly. Reheat in a toaster oven for optimal results.
Separate Components:
If preparing Tuna Melts for later consumption, store the tuna salad, bread, and cheese separately until ready to assemble and cook.
Conclusion
You’ve unlocked the keys to crafting the flawless Tuna Melt. Ready to dive into a culinary escapade that guarantees not just a delectable meal but an experience that will enchant your taste buds? Roll up your sleeves, gather your ingredients, and set forth on a flavor-filled journey – cooking and savoring in delightful harmony.
